

Introduction to Carmelitas Delight Recipe
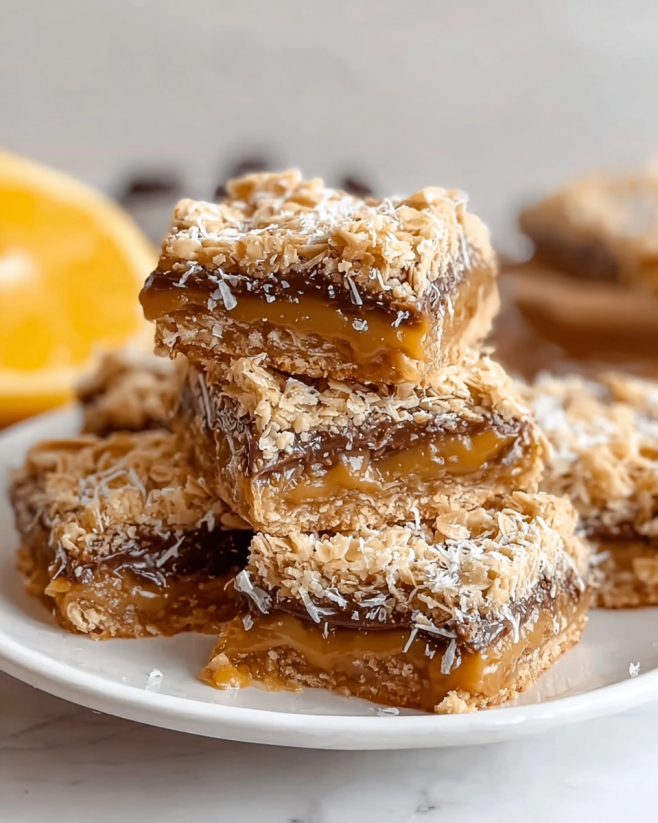
Carmelitas Delight Recipe is just what you need! This delightful dessert is not only easy to make but also incredibly satisfying. With a chewy oat crust, gooey caramel filling, and a sprinkle of chocolate chips, it’s a dessert that will please everyone at your table.
What are Carmelitas?
Carmelitas are a delicious dessert bar that originated in the United States. They are known for their unique combination of flavors and textures. The base is made from oats and flour, creating a crumbly yet chewy crust. This crust is then layered with rich chocolate chips and a luscious caramel sauce, making each bite a heavenly experience.
What sets Carmelitas apart is their versatility. You can easily customize them by adding nuts, using different types of chocolate, or even incorporating a hint of sea salt for that perfect sweet and salty balance. Whether you’re serving them at a party or enjoying them as a snack, Carmelitas are sure to impress!
In the following sections, we will guide you through the ingredients and step-by-step preparation of this delightful recipe. Get ready to indulge in a treat that’s not only delicious but also simple to make!
Ingredients for Carmelitas Delight Recipe
Carmelitas Delight Recipe, you’ll need a few simple ingredients. Each component plays a vital role in achieving that delightful balance of flavors and textures. Here’s what you’ll need:
- 1 cup all-purpose flour
- 1 cup rolled oats
- 1/2 cup packed brown sugar
- 1/2 teaspoon baking soda
- 1/4 teaspoon salt
- 1/2 cup unsalted butter, melted
- 1/2 cup chocolate chips
- 1/2 cup caramel sauce (store-bought or homemade)
- 1/4 cup chopped nuts (optional)
These ingredients come together to create a deliciously chewy base, a gooey caramel layer, and a sprinkle of chocolate that makes every bite irresistible. The oats add a hearty texture, while the brown sugar provides a rich sweetness. If you want to add a little crunch, consider tossing in some chopped nuts. They not only enhance the flavor but also add a delightful contrast to the soft caramel and chocolate.
Now that you have your ingredients ready, let’s move on to the step-by-step preparation of this scrumptious dessert!
Step-by-Step Preparation of Carmelitas Delight Recipe
Carmelitas Delight Recipe. Follow these simple steps to create a dessert that will leave everyone wanting more!
Step 1: Preparing the Base
First, you need to create the base for your Carmelitas. In a medium bowl, combine the all-purpose flour, rolled oats, brown sugar, baking soda, and salt. Mix these dry ingredients well to ensure they are evenly distributed. Next, pour in the melted unsalted butter. Stir everything together until the mixture becomes crumbly. This crumbly texture is essential for a delicious crust.
Once mixed, reserve 1 cup of this mixture for the topping. Then, take the remaining mixture and press it firmly into the bottom of your greased 8×8-inch baking dish. Make sure it’s evenly spread out to form a solid crust. This step is crucial, as it will hold all the delicious layers together!
Step 2: Making the Caramel Filling
Now, let’s move on to the caramel filling. If you’re using store-bought caramel sauce, simply have it ready to drizzle. If you prefer homemade caramel, you can make it by melting sugar in a saucepan until it turns golden brown, then adding cream and butter. Stir until smooth. This homemade version adds a rich flavor that’s hard to beat!
Once your caramel is ready, it’s time to layer it. Start by sprinkling the chocolate chips evenly over the baked crust. Then, drizzle the caramel sauce generously over the chocolate chips. If you’re using chopped nuts, sprinkle them on top of the caramel layer. This adds a delightful crunch and enhances the overall flavor.
Step 3: Assembling the Carmelitas
After layering the chocolate and caramel, it’s time to add the final touch. Take the reserved crumbly mixture from earlier and crumble it over the caramel layer. This will create a beautiful topping that will bake to a golden brown. Make sure to cover the caramel evenly, so every bite has that delicious oat topping.
Step 4: Baking the Carmelitas
Now, it’s time to bake your Carmelitas! Place the baking dish in the preheated oven at 350°F (175°C) and bake for 15-20 minutes. Keep an eye on them as they bake. You want the topping to turn a lovely golden brown color. Once they are done, remove them from the oven and let them cool completely in the pan. This cooling time is important, as it allows the layers to set properly.
After cooling, cut the Carmelitas into squares and enjoy! Each bite will be a delightful mix of chewy oats, rich chocolate, and gooey caramel. Your friends and family will surely be impressed with your baking skills!
Variation of Carmelitas Delight Recipe
Carmelitas Delight Recipe is already a crowd-pleaser, there are many ways to switch things up! By experimenting with alternative ingredients and flavor variations, you can create a unique twist on this delicious dessert. Let’s explore some exciting options!
Alternative Ingredients for Carmelitas Delight Recipe
Sometimes, you might not have all the ingredients on hand, or you may want to cater to specific dietary needs. Here are some alternative ingredients you can use:
- Gluten-Free Flour: Substitute all-purpose flour with a gluten-free blend to make this recipe suitable for those with gluten sensitivities.
- Maple Syrup: Instead of brown sugar, you can use maple syrup for a natural sweetener that adds a unique flavor.
- Nut Butters: For a nutty twist, consider adding almond or peanut butter to the crust mixture. This will enhance the flavor and add healthy fats.
- Dried Fruits: Incorporate dried fruits like cranberries or raisins for a chewy texture and a burst of flavor.
- Vegan Butter: If you’re looking for a dairy-free option, use vegan butter instead of unsalted butter.
These alternatives can help you customize your Carmelitas while still keeping them delicious and satisfying!
Flavor Variations to Try
In addition to alternative ingredients, you can also play around with flavors to create your own signature Carmelitas. Here are some fun ideas:
- Mint Chocolate: Add a few drops of peppermint extract to the caramel layer for a refreshing minty flavor.
- Peanut Butter Swirl: Drizzle some peanut butter over the caramel layer before adding the topping for a rich, nutty taste.
- Spiced Carmelitas: Mix in a teaspoon of cinnamon or pumpkin spice to the crust for a warm, cozy flavor.
- Fruit Infusion: Layer fresh banana slices or strawberries on top of the chocolate chips for a fruity twist.
- Sea Salt Caramel: Sprinkle a pinch of sea salt on top of the caramel layer before adding the topping for a sweet and salty contrast.
These flavor variations can elevate your Carmelitas Delight Recipe, making it a delightful treat for any occasion. So, don’t hesitate to get creative and make this recipe your own!
Cooking Note for Carmelitas Delight Recipe
Carmelitas Delight Recipe, there are a few cooking notes to keep in mind to ensure your dessert turns out perfectly every time. These tips will help you achieve the best flavor and texture, making your Carmelitas a hit with everyone!
First, always preheat your oven to the correct temperature. This step is crucial for even baking. If the oven isn’t hot enough, the crust may not set properly, leading to a soggy bottom. On the other hand, if it’s too hot, the topping can burn before the caramel has a chance to melt.
Next, be sure to grease your baking dish well. This will prevent the Carmelitas from sticking, making it easier to cut them into squares once they cool. You can use cooking spray or a light coating of butter for this purpose.
When mixing the ingredients, avoid over-mixing the crust mixture. You want it to be crumbly, not a smooth dough. This texture is what gives the Carmelitas their delightful chewiness.
Additionally, let the Carmelitas cool completely in the pan before cutting. This cooling time allows the layers to set, making it easier to slice them into neat squares. If you’re in a hurry, you can place the pan in the refrigerator for a quicker cool-down.
Lastly, feel free to experiment with the baking time. Every oven is different, so keep an eye on your Carmelitas as they bake. You want the topping to be golden brown, but not too dark. If you notice it browning too quickly, you can cover the pan loosely with aluminum foil to prevent burning.
By following these cooking notes, you’ll be well on your way to creating a delicious batch of Carmelitas that everyone will love!
Serving Suggestions for Carmelitas Delight Recipe
Carmelitas Delight Recipe is baked and cooled, it’s time to think about how to serve this delicious treat. The way you present your Carmelitas can enhance the overall experience, making them even more enjoyable. Here are some delightful serving suggestions to consider!
Pairing with Beverages
Choosing the right beverage to accompany your Carmelitas can elevate the dessert experience. Here are some great pairing ideas:
- Coffee: A warm cup of coffee complements the rich flavors of chocolate and caramel beautifully. The bitterness of coffee balances the sweetness of the Carmelitas.
- Tea: For a lighter option, serve with a cup of herbal tea. Chamomile or mint tea can provide a refreshing contrast to the sweet treat.
- Milk: A classic pairing! A glass of cold milk is perfect for dipping and enhances the flavors of the Carmelitas.
- Hot Chocolate: For chocolate lovers, a warm cup of hot chocolate can be a delightful addition. Top it with whipped cream for an extra indulgence!
- Ice Cream: Serve your Carmelitas warm with a scoop of vanilla ice cream on the side. The melting ice cream adds a creamy texture that pairs perfectly with the chewy bars.
These beverage pairings can make your dessert experience even more enjoyable, so feel free to mix and match based on your preferences!
Presentation Ideas
How you present your Carmelitas can make a big difference in how they are received. Here are some creative presentation ideas:
- Platter Display: Arrange the cut squares on a decorative platter. You can sprinkle some extra chocolate chips or nuts on top for a beautiful finish.
- Individual Servings: For a more formal touch, serve each square on a small dessert plate. Add a dollop of whipped cream or a drizzle of extra caramel sauce on top.
- Garnish: Consider garnishing with fresh mint leaves or a sprinkle of sea salt to enhance the visual appeal and flavor.
- Wrap and Gift: If you’re sharing your Carmelitas, wrap them in clear cellophane and tie with a ribbon. This makes for a lovely homemade gift!
- Seasonal Touch: For special occasions, decorate the platter with seasonal fruits or edible flowers to add a festive touch.
With these serving suggestions, your Carmelitas Delight will not only taste amazing but also look stunning on any table. Enjoy sharing this delightful dessert with family and friends!
Tips for Perfecting Your Carmelitas Delight Recipe
Carmelitas Delight Recipe turns out perfectly every time, consider these helpful tips. They will guide you in achieving the best flavor, texture, and overall presentation. Let’s dive into some expert advice!
First, always measure your ingredients accurately. Using the right amounts of flour, oats, and sugar is crucial for the perfect texture. A kitchen scale can help you get precise measurements, especially for the flour.
Next, when mixing the crust, aim for a crumbly texture. If the mixture is too wet, your crust may turn out dense instead of chewy. If it feels too dry, add a little more melted butter, one tablespoon at a time, until you reach the right consistency.
Another tip is to let your caramel sauce cool slightly before drizzling it over the chocolate chips. This prevents the chocolate from melting too much and helps maintain distinct layers. If you’re using homemade caramel, be sure to stir it well to ensure a smooth consistency.
When baking, keep an eye on the Carmelitas during the last few minutes. Ovens can vary, and you want to catch them just as they turn golden brown. If they start to darken too quickly, cover them loosely with aluminum foil to prevent burning.
After baking, patience is key! Allow the Carmelitas to cool completely in the pan. This cooling time helps the layers set properly, making it easier to cut them into neat squares. If you’re in a hurry, you can place the pan in the refrigerator for about 30 minutes to speed up the cooling process.
Lastly, don’t hesitate to experiment with flavors and toppings. Whether you add nuts, different types of chocolate, or a sprinkle of sea salt, these small changes can make a big difference. Each batch can be a new adventure!
By following these tips, you’ll be well on your way to creating the most delicious Carmelitas Delight. Enjoy the process and the delightful results!
Breakdown of Time for Carmelitas Delight Recipe
Carmelitas Delight Recipe can help you plan your baking session better. Here’s a quick breakdown of the time required for preparation and cooking, so you can enjoy this delicious treat without any rush!
Prep Time
The prep time for the Carmelitas Delight Recipe is approximately 15-20 minutes. This includes gathering your ingredients, mixing the crust, and preparing the caramel filling. Make sure to have everything ready before you start, as it will make the process smoother and more enjoyable!
Cooking Time
The cooking time for the Carmelitas is about 25-30 minutes. This consists of 10 minutes for baking the crust and an additional 15-20 minutes for baking the assembled layers. Keep an eye on them during the last few minutes to ensure they turn a lovely golden brown without burning.
Total Time
In total, you can expect to spend around 45-50 minutes from start to finish. This includes both prep and cooking time. Once they are baked, remember to let the Carmelitas cool completely in the pan before cutting them into squares. This cooling time is essential for the layers to set properly, ensuring a perfect bite every time!
Carmelitas Delight Recipe into your schedule. Happy baking!
Nutritional Information for Carmelitas Delight Recipe
Carmelitas Delight Recipe can help you enjoy this delicious treat while keeping track of your dietary needs. Here’s a breakdown of the key nutritional components per serving, so you can indulge with confidence!
Calories
Each serving of Carmelitas contains approximately 210 calories. This makes it a satisfying dessert option without being overly indulgent. The combination of oats, chocolate, and caramel provides a delightful treat that can be enjoyed in moderation.
Protein
In terms of protein, each serving offers about 2 grams. While this isn’t a high-protein dessert, the oats contribute some protein along with fiber, making it a more balanced option compared to many other sweet treats.
Sodium
The sodium content in each serving is relatively low, making it a heart-friendly choice. With only a small amount of salt used in the recipe, you can enjoy your Carmelitas without worrying too much about sodium intake. This is especially beneficial for those monitoring their salt consumption.
Carmelitas Delight Recipe provides a delicious balance of flavors and textures while still being mindful of nutritional content. Enjoy this delightful dessert as part of a balanced diet, and feel free to share it with friends and family!
FAQs about Carmelitas Delight Recipe
Can I make Carmelitas ahead of time?
Carmelitas Delight Recipe ahead of time. In fact, making them a day in advance can enhance the flavors as they sit. Just bake them, let them cool completely, and store them in an airtight container at room temperature. This way, they’ll be ready to serve when you need them!
How do I store leftover Carmelitas?
Storing leftover Carmelitas is easy! Simply place them in an airtight container. You can keep them at room temperature for up to three days. If you want to keep them fresh for longer, consider refrigerating them. Just remember to let them come to room temperature before serving for the best taste and texture.
Can I freeze Carmelitas?
Yes, you can freeze Carmelitas! To do this, cut them into squares and place them in a single layer on a baking sheet. Freeze until solid, then transfer them to an airtight container or freezer bag. They can be stored in the freezer for up to three months. When you’re ready to enjoy them, simply thaw them in the refrigerator or at room temperature.
What can I substitute for the caramel in the recipe?
If you don’t have caramel sauce on hand, there are several substitutes you can use. You can try using dulce de leche, which has a similar flavor and texture. Alternatively, you can make a quick homemade caramel by melting sugar and mixing it with cream and butter. For a healthier option, consider using a fruit spread or a nut butter for a different twist. Each substitute will give your Carmelitas a unique flavor!
Conclusion on Carmelitas Delight Recipe
Carmelitas Delight Recipe is a fantastic dessert that brings together the best of chocolate and caramel in a delightful, chewy bar. With its simple ingredients and easy preparation, it’s perfect for both novice bakers and seasoned pros. Whether you’re making them for a special occasion or just to satisfy a sweet craving, these Carmelitas are sure to impress.
By following the steps outlined in this article, you can create a delicious treat that not only tastes amazing but also looks beautiful on any dessert table. Plus, with the various tips and variations provided, you can customize your Carmelitas to suit your taste preferences or dietary needs.
So, gather your ingredients, preheat your oven, and get ready to enjoy the delightful flavors of Carmelitas. They are perfect for sharing with friends and family or simply indulging in a sweet moment for yourself. Happy baking!