

Introduction to Artisan Bread Recipes
Artisan bread is more than just a loaf; it’s a labor of love. This type of bread is crafted with care, using traditional methods and high-quality ingredients. Unlike mass-produced bread, artisan bread often features a unique texture and flavor, making it a favorite among bread enthusiasts. In this section, we will explore what makes artisan bread unique and why these recipes are so appealing.
What Makes Artisan Bread Unique?
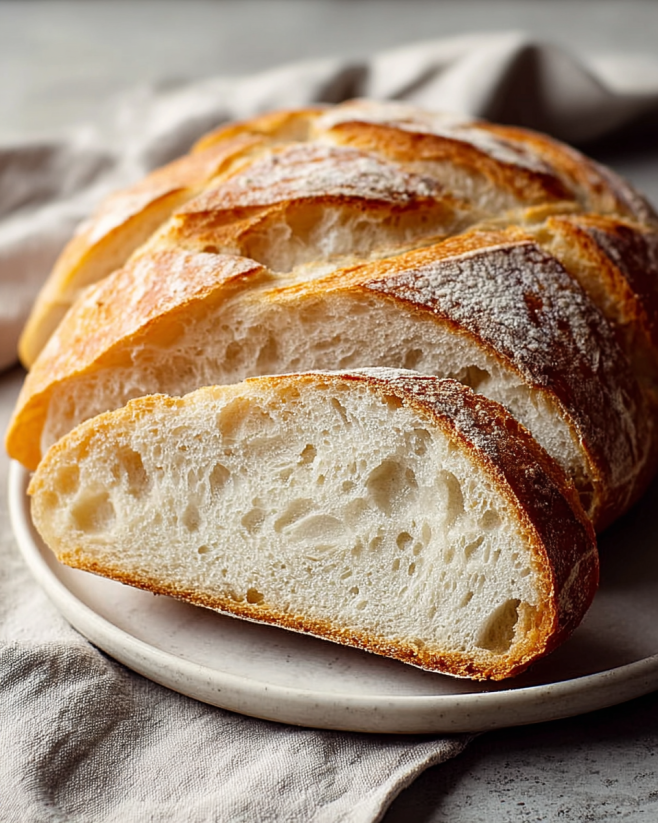
Artisan bread stands out due to its handmade nature. Each loaf is typically made in small batches, allowing bakers to pay close attention to every detail. The use of simple ingredients—like flour, water, salt, and yeast—combined with long fermentation times, results in a rich flavor and chewy texture. The crust is often thicker and crunchier, while the inside remains soft and airy. This contrast is what many people love about artisan bread.
Moreover, artisan bread often showcases regional ingredients and techniques. For instance, a sourdough from San Francisco may have a distinct tang due to the local wild yeast. This connection to place adds a layer of uniqueness to each loaf, making it a true reflection of its environment.
The Appeal of Artisan Bread Recipes
There’s something special about baking artisan bread at home. The process can be incredibly rewarding. As you mix, knead, and shape the dough, you engage in a hands-on experience that connects you to the art of baking. The aroma of fresh bread wafting through your home is simply irresistible.
Additionally, artisan bread recipes are versatile. You can customize them to suit your taste by adding herbs, spices, or even cheese. This flexibility allows you to create a loaf that’s perfect for any occasion, whether it’s a cozy family dinner or a festive gathering with friends.
In summary, artisan bread recipes offer a unique blend of tradition, flavor, and creativity. They invite you to explore the world of baking while enjoying the delicious results. So, let’s dive into the ingredients needed to create your very own artisan bread!
Ingredients for Artisan Bread Recipes
To create a delicious loaf of artisan bread, you need just a few simple ingredients. Each component plays a vital role in the final product, contributing to the flavor, texture, and overall quality of the bread. Here’s a breakdown of the essential ingredients you’ll need:
- All-Purpose Flour: This is the main ingredient in artisan bread recipes. It provides the structure and chewiness that we love in bread. You can also experiment with bread flour for a chewier texture.
- Salt: Salt enhances the flavor of the bread and helps control yeast activity. It’s crucial for achieving the right taste and texture.
- Instant Yeast: This type of yeast is perfect for artisan bread recipes. It activates quickly, allowing the dough to rise efficiently. You can also use active dry yeast, but it may require proofing.
- Warm Water: Water is essential for hydrating the flour and activating the yeast. The ideal temperature is around 110°F, which helps the yeast thrive without killing it.
These four ingredients are the foundation of your artisan bread. However, you can also add optional ingredients to enhance the flavor and texture:
- Herbs and Spices: Adding dried herbs like rosemary or thyme can elevate the flavor of your bread.
- Cheese: Incorporating shredded cheese into the dough can create a savory twist.
- Whole Grains: Mixing in whole wheat flour or other grains can add nutrition and a nutty flavor.
- Fruits and Nuts: For a sweet variation, consider adding dried fruits like cranberries or nuts like walnuts.
With these ingredients in hand, you’re ready to embark on your artisan bread-making journey. The next step is to learn how to prepare the dough properly. Let’s move on to the step-by-step preparation of artisan bread recipes!
Step-by-Step Preparation of Artisan Bread Recipes
Now that you have your ingredients ready, it’s time to dive into the exciting process of making artisan bread. Each step is crucial for achieving that perfect loaf. Let’s break it down step by step!
Step 1: Mixing the Dough
Start by taking a large mixing bowl. Combine the all-purpose flour, salt, and instant yeast. Stir these dry ingredients together until they are well mixed. This step is important because it ensures that the yeast and salt are evenly distributed throughout the flour. Next, gradually add the warm water to the dry mixture. Use a wooden spoon or spatula to mix until a shaggy dough forms. It should look a bit messy, and that’s perfectly fine!
Step 2: Kneading the Dough
Unlike traditional bread recipes, artisan bread doesn’t require extensive kneading. Instead, you’ll let the dough rest and develop its gluten naturally. However, if you prefer a bit of kneading, you can do so gently on a floured surface for about 5 minutes. Just be careful not to overwork the dough. The goal is to create a soft, elastic texture without making it tough.
Step 3: First Rise
Once your dough is mixed, it’s time for the first rise. Cover the bowl with plastic wrap or a clean kitchen towel. Let it rest at room temperature for 12 to 18 hours. This long fermentation period is what gives artisan bread its unique flavor and texture. You’ll know it’s ready when the surface is bubbly and the dough has doubled in size. Patience is key here!
Step 4: Shaping the Dough
After the first rise, lightly flour a clean surface. Turn the dough out onto this surface. With floured hands, gently shape the dough into a ball. Be careful not to deflate it too much. The goal is to maintain the air bubbles that formed during the rise. Once shaped, place the dough seam-side down on a floured piece of parchment paper. Cover it with a towel and let it rise again for 1 to 2 hours.
Step 5: Second Rise
This second rise is crucial for developing the bread’s structure. During this time, the dough will puff up even more. It’s important to keep it covered to prevent it from drying out. You can use this time to preheat your oven, which is essential for achieving that perfect crust.
Step 6: Baking the Bread
About 30 minutes before you’re ready to bake, preheat your oven to 450°F. Place a Dutch oven (with the lid) inside to heat up. Once the oven is hot, carefully remove the Dutch oven. Lift the parchment paper with the dough and place it into the pot. Cover it with the lid and bake for 30 minutes. After that, remove the lid and bake for an additional 15 to 20 minutes. You’ll know it’s done when the bread is golden brown and sounds hollow when tapped on the bottom. Finally, let it cool on a wire rack before slicing.
And there you have it! You’ve just made artisan bread from scratch. The process may seem lengthy, but the results are well worth the effort. Now, let’s explore some delicious variations of artisan bread recipes!
Variation of Artisan Bread Recipes
Artisan bread recipes are incredibly versatile. You can easily customize them to suit your taste preferences. By adding different ingredients, you can create unique flavors and textures. Let’s explore some exciting variations that will elevate your artisan bread experience!
Adding Herbs and Spices
One of the simplest ways to enhance your artisan bread is by incorporating herbs and spices. Fresh or dried herbs can add a delightful aroma and flavor. For instance, mixing in rosemary or thyme can give your bread a savory twist. You can also experiment with garlic powder or onion powder for an extra kick. Just add about 1 to 2 tablespoons of your chosen herbs or spices to the dry ingredients during the mixing stage. This small addition can transform your bread into a flavorful masterpiece!
Incorporating Whole Grains
If you’re looking to boost the nutritional value of your artisan bread, consider incorporating whole grains. Whole wheat flour is a fantastic option. It adds a nutty flavor and increases the fiber content. You can replace up to half of the all-purpose flour with whole wheat flour without compromising the texture. Additionally, you can mix in other grains like oats or spelt for added depth. Just remember to adjust the water slightly, as whole grains absorb more moisture.
Sweet Variations: Adding Fruits and Nuts
For those with a sweet tooth, artisan bread can be transformed into a delightful treat by adding fruits and nuts. Dried fruits like cranberries, apricots, or raisins can bring a burst of sweetness. Chopped nuts, such as walnuts or pecans, add a satisfying crunch. To create a sweet variation, mix in about 1 cup of your chosen fruits and nuts during the dough mixing stage. This will create a deliciously sweet loaf that pairs perfectly with breakfast or as a snack!
These variations not only enhance the flavor but also allow you to express your creativity in the kitchen. Whether you prefer savory or sweet, there’s an artisan bread recipe variation for everyone. Now that you’ve learned how to customize your bread, let’s move on to some important cooking notes for artisan bread recipes!
Cooking Note for Artisan Bread Recipes
When it comes to baking artisan bread, a few cooking notes can make a significant difference in your results. Understanding these tips will help you achieve that perfect loaf every time. Here are some essential cooking notes to keep in mind:
- Temperature Matters: The temperature of your ingredients is crucial. Ensure your water is warm, around 110°F, to activate the yeast effectively. If the water is too hot, it can kill the yeast, while cold water may not activate it properly.
- Humidity Levels: Baking can be affected by humidity. On humid days, you may need to adjust the amount of flour you use. Start with less flour and add more as needed to achieve the right dough consistency.
- Use a Dutch Oven: Baking your artisan bread in a Dutch oven helps create steam, which is essential for a crispy crust. If you don’t have a Dutch oven, you can place a shallow pan with water in the oven to create steam.
- Don’t Rush the Process: Artisan bread requires time for fermentation and rising. Allowing the dough to rest and rise properly is key to developing flavor and texture. Patience is your best friend in this process!
- Check for Doneness: To ensure your bread is fully baked, tap the bottom of the loaf. If it sounds hollow, it’s done. If not, give it a few more minutes in the oven.
By keeping these cooking notes in mind, you’ll be well on your way to mastering artisan bread recipes. Each loaf you bake will be a testament to your skills and dedication. Now, let’s explore some serving suggestions that will complement your delicious artisan bread!
Serving Suggestions for Artisan Bread Recipes
Once you’ve baked your artisan bread, the fun doesn’t stop there! This delicious loaf can be enjoyed in many ways. Whether you’re looking for a simple snack or a hearty meal, artisan bread is incredibly versatile. Let’s explore some delightful serving suggestions that will elevate your bread experience!
Pairing with Dips and Spreads
Artisan bread pairs wonderfully with a variety of dips and spreads. The crusty exterior and soft interior make it perfect for scooping and dipping. Here are some tasty options:
- Olive Oil and Balsamic Vinegar: A classic combination! Drizzle some high-quality olive oil and balsamic vinegar on a plate. Dip your bread for a simple yet flavorful treat.
- Hummus: This creamy spread is a fantastic match for artisan bread. Try different flavors like roasted red pepper or garlic for added variety.
- Cheese Spreads: Soft cheeses like goat cheese or cream cheese can be spread on warm slices of bread. Add herbs or spices for extra flavor.
- Guacamole: The creamy texture of guacamole complements the bread perfectly. It’s a great option for a light lunch or snack.
These pairings not only enhance the flavor of your artisan bread but also make for a delightful appetizer or snack for gatherings. Now, let’s look at how to use artisan bread in sandwiches!
Using Artisan Bread in Sandwiches
Artisan bread makes an excellent base for sandwiches. Its sturdy structure holds up well against various fillings. Here are some delicious sandwich ideas:
- Classic BLT: Layer crispy bacon, fresh lettuce, and juicy tomatoes between slices of artisan bread. Add a spread of mayonnaise for extra creaminess.
- Caprese Sandwich: Stack fresh mozzarella, tomatoes, and basil leaves on your bread. Drizzle with balsamic glaze for a refreshing taste.
- Turkey and Avocado: Combine sliced turkey, avocado, and your favorite cheese for a hearty sandwich. Add some spinach for a healthy crunch.
- Grilled Cheese: Use artisan bread for a gourmet grilled cheese. Pair it with your favorite cheeses and grill until golden brown.
These sandwich ideas showcase the versatility of artisan bread. Whether you prefer a light snack or a filling meal, there’s a perfect option for everyone. Now that you know how to serve your artisan bread, let’s move on to some tips for perfecting your baking skills!
Tips for Perfecting Artisan Bread Recipes
Baking artisan bread can be a delightful experience, but it’s essential to avoid common pitfalls. With a few tips, you can enhance your skills and create the perfect loaf every time. Let’s explore some common mistakes to avoid and the tools you’ll need for success!
Common Mistakes to Avoid
Even seasoned bakers can make mistakes. Here are some common errors to watch out for:
- Using Cold Ingredients: Always use warm water to activate the yeast. Cold ingredients can slow down the fermentation process, leading to dense bread.
- Skipping the First Rise: Don’t rush the fermentation. Skipping the first rise can result in a lack of flavor and texture. Allow the dough to rise fully for the best results.
- Overworking the Dough: Artisan bread doesn’t require extensive kneading. Overworking can make the bread tough. Gently shape the dough instead.
- Not Preheating the Oven: Always preheat your oven and Dutch oven. A hot oven is crucial for achieving a crispy crust.
- Ignoring the Dough’s Texture: Pay attention to the dough’s consistency. If it feels too sticky, add a little flour. If it’s too dry, add a splash of water.
By avoiding these common mistakes, you’ll be on your way to baking delicious artisan bread. Now, let’s look at the essential tools and equipment you’ll need for your baking journey!
Tools and Equipment for Artisan Bread
Having the right tools can make a significant difference in your baking experience. Here’s a list of essential equipment for making artisan bread:
- Mixing Bowl: A large mixing bowl is necessary for combining your ingredients. Choose one that’s easy to handle and clean.
- Wooden Spoon or Spatula: Use a sturdy wooden spoon or spatula for mixing the dough. This will help you combine the ingredients without damaging the bowl.
- Floured Surface: A clean, floured surface is essential for shaping your dough. A countertop or large cutting board works well.
- Parchment Paper: This is useful for transferring the dough into the Dutch oven. It prevents sticking and makes cleanup easier.
- Dutch Oven: A heavy Dutch oven is ideal for baking artisan bread. It retains heat and creates steam, resulting in a perfect crust.
- Wire Rack: After baking, a wire rack allows your bread to cool evenly. This prevents the bottom from becoming soggy.
With these tools in hand, you’re well-equipped to tackle artisan bread recipes. Remember, practice makes perfect, so don’t be afraid to experiment and learn from each loaf you bake!
Breakdown of Time for Artisan Bread Recipes
Understanding the time commitment for artisan bread recipes is essential for planning your baking day. While the process may seem lengthy, much of the time involves waiting for the dough to rise. Here’s a breakdown of the time you’ll need for each stage of the process.
Prep Time
The prep time for artisan bread recipes is relatively short. You’ll spend about 15 to 20 minutes mixing the ingredients and shaping the dough. This includes:
- Measuring and mixing the dry ingredients.
- Adding warm water and stirring until a shaggy dough forms.
- Shaping the dough into a ball after the first rise.
Overall, you can expect to spend around 20 minutes on prep work before letting the dough rise.
Cooking Time
Once your dough has risen, the cooking time is straightforward. Here’s how it breaks down:
- Preheating the oven and Dutch oven: about 30 minutes.
- Baking with the lid on: 30 minutes.
- Baking without the lid: 15 to 20 minutes.
In total, the cooking time will take approximately 1 hour. This includes both the preheating and baking stages.
Total Time
When you combine the prep time and cooking time, the total time for making artisan bread is around 12 to 18 hours and 1 hour. Here’s a quick summary:
- Prep Time: 20 minutes
- Cooking Time: 1 hour
- Total Time: 12 to 18 hours (including the first rise)
While the total time may seem long, remember that most of it is hands-off. You can go about your day while the dough rises, making artisan bread a rewarding and manageable project. Now that you have a clear understanding of the time involved, let’s move on to the nutritional information for artisan bread recipes!
Nutritional Information for Artisan Bread Recipes
Understanding the nutritional content of artisan bread is essential for those who are health-conscious or following specific dietary plans. Artisan bread, while delicious, can also be a part of a balanced diet. Let’s break down the key nutritional components of artisan bread recipes.
Calories
Each serving of artisan bread contains approximately 150 calories. This makes it a relatively moderate option for those looking to enjoy bread without overindulging. The calorie content can vary slightly based on the specific ingredients and any variations you choose to add, such as cheese or nuts. However, artisan bread can still fit into a healthy eating plan when consumed in moderation.
Protein
Artisan bread provides about 4 grams of protein per serving. While this isn’t a high protein food, it does contribute to your daily intake. The protein in bread comes primarily from the flour used in the recipe. If you’re looking to increase the protein content, consider adding ingredients like seeds or nuts, which can enhance both flavor and nutrition.
Sodium
The sodium content in artisan bread is around 0.5 grams per serving. This is relatively low compared to many store-bought breads, which can contain added preservatives and higher sodium levels. By making artisan bread at home, you have control over the amount of salt you use, allowing you to tailor it to your dietary needs.
In summary, artisan bread can be a nutritious addition to your meals. With its moderate calorie count, decent protein content, and low sodium levels, it can be enjoyed as part of a balanced diet. Now that you’re aware of the nutritional benefits, let’s move on to some frequently asked questions about artisan bread recipes!
FAQs about Artisan Bread Recipes
What is the difference between artisan bread and regular bread?
The main difference between artisan bread and regular bread lies in the method of preparation and the quality of ingredients. Artisan bread is typically made in small batches, allowing bakers to focus on the details. It uses simple, high-quality ingredients like flour, water, salt, and yeast. This results in a unique flavor and texture. Regular bread, on the other hand, is often mass-produced with additives and preservatives, leading to a more uniform taste and texture. Artisan bread is celebrated for its crusty exterior and chewy interior, making it a favorite among bread lovers.
How long does artisan bread last?
Artisan bread is best enjoyed fresh, but it can last for several days when stored properly. Typically, it will stay fresh for about 2 to 3 days at room temperature. To keep it from getting stale, store it in a paper bag or wrapped in a clean kitchen towel. Avoid plastic bags, as they can trap moisture and make the crust soft. If you want to extend its shelf life, consider freezing the bread. When frozen, artisan bread can last for up to 3 months. Just make sure to wrap it tightly in plastic wrap or aluminum foil before placing it in the freezer.
Can I freeze artisan bread?
Yes, you can freeze artisan bread! Freezing is a great way to preserve its freshness for later use. To freeze artisan bread, first, let it cool completely after baking. Then, wrap it tightly in plastic wrap or aluminum foil to prevent freezer burn. You can also place it in a resealable freezer bag for extra protection. When you’re ready to enjoy it, simply remove the bread from the freezer and let it thaw at room temperature. For the best texture, you can also reheat it in the oven for a few minutes to restore its crustiness.
What flour is best for artisan bread recipes?
The best flour for artisan bread recipes is all-purpose flour or bread flour. All-purpose flour is versatile and works well for most artisan bread recipes, providing a good balance of protein and gluten. Bread flour, which has a higher protein content, is ideal for achieving a chewier texture and a better rise. If you want to experiment, you can also mix in whole wheat flour or other specialty flours for added flavor and nutrition. Just remember to adjust the water content as needed, since different flours absorb moisture differently.
Conclusion on Artisan Bread Recipes
In conclusion, artisan bread recipes offer a delightful journey into the world of baking. With just a few simple ingredients and a bit of patience, you can create a loaf that is not only delicious but also a true reflection of your baking skills. The unique flavors and textures of artisan bread make it a wonderful addition to any meal or occasion.
Throughout this article, we’ve explored the essential ingredients, step-by-step preparation, and various ways to customize your bread. From adding herbs and spices to incorporating whole grains or sweet fruits, the possibilities are endless. Each variation allows you to express your creativity and cater to your taste preferences.
Moreover, understanding the cooking notes and tips for perfecting your artisan bread will help you avoid common mistakes and achieve the best results. Remember, baking is as much about the process as it is about the final product. Enjoy the experience, and don’t hesitate to experiment with different flavors and techniques.
As you embark on your artisan bread-making journey, keep in mind the nutritional benefits it offers. With moderate calories, decent protein, and low sodium, artisan bread can be a wholesome part of your diet. Whether you enjoy it fresh, as part of a sandwich, or paired with dips, artisan bread is sure to impress your family and friends.
So, gather your ingredients, roll up your sleeves, and start baking! With each loaf, you’ll not only create something delicious but also gain confidence in your baking abilities. Happy baking!
Artisan Bread
Ingredients
Equipment
Method
- Mix the flour, salt, and yeast in a bowl. Gradually add warm water and mix until a shaggy dough forms.
- Let the dough rest for 12 to 18 hours at room temperature for the first rise.
- Shape the dough into a ball and let it rise for 1 to 2 hours.
- Preheat the oven to 450°F and bake the bread in a Dutch oven for 30 minutes with the lid on, then 15 to 20 minutes without the lid.
- Let the bread cool on a wire rack before slicing.